
MUST READ Important Notes:
Threat Levels provide the ability to lockdown a building and disable most or all badges with a click of the mouse. A perfect scenario for this would be an Active shooter situation.
The configuration of the MVP Access Threat Level Management is based on Lockdown Areas. In addition to Lockdown Areas, Threat Level Management is also configured using Category Counters. Category Counters can be found in Personnel, under the Control tab.
To open Threat Level Management, click Administration>Threat Level Management on the MVP Access main menu.
Note: By default, there are 5 preconfigured Threat levels for each Company/Account.

Add Threat Level
Very Important: Prior to configuring Threat Levels, you must configure Lockdown Areas.
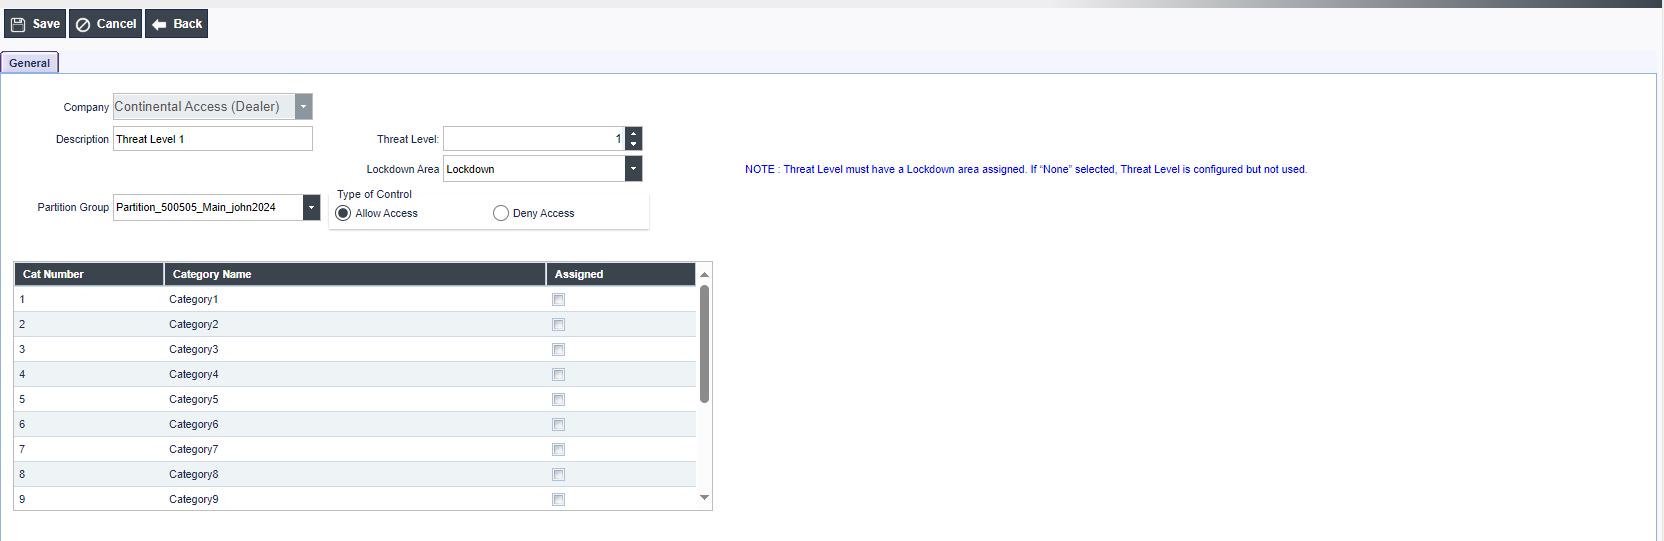
Upon Launching Threat Level Management, the Threat Level Management configuration screen will display. Perform the following steps to configure a new Threat level.
Click Add.
Type in a Description for the Threat Level.
Select a predefined Lockdown Area.
Select a color assignment for the Threat Level.
Select Type of Control for the Threat Level (Allow Access or Deny Access).
Allow Access will only allow Access to the badges with the matching category counters and all other badges will not gain access.
Deny Access will only deny Access to the badges with the matching category counters and all other badges will gain access.
Select the Partition Group the Threat Level will be applied to.
On the bottom half of the screen, you MUST assign the categories to the Threat Level by clicking Assign on the bottom right side of screen.
Note: If the category is already used, it will be noted that it is In Use.
Below are the Threat Level settings previously described.
Categories
The Category selected in Personnel for a badge determines the Threat Level that applies to the Badge. For instance, the Police badges can be assigned Category 1 in Personnel, and under Threat Levels, Category 1 is used for the Threat Level that would apply to Police badges. A typical scenario for an active shooter situation would most likely be all badges are disabled except for Police. This includes locking down all doors.
Edit Threat Level
To Edit an existing Threat Level, perform the following steps.
Click the Threat Level you wish to Edit.
Click Edit.
Make the necessary changes and click Save.
Delete Threat Level
To Delete an existing Threat Level, perform the following steps.
Click the Threat Level you wish to delete.
Click Delete.