
MUST READ Important Notes:
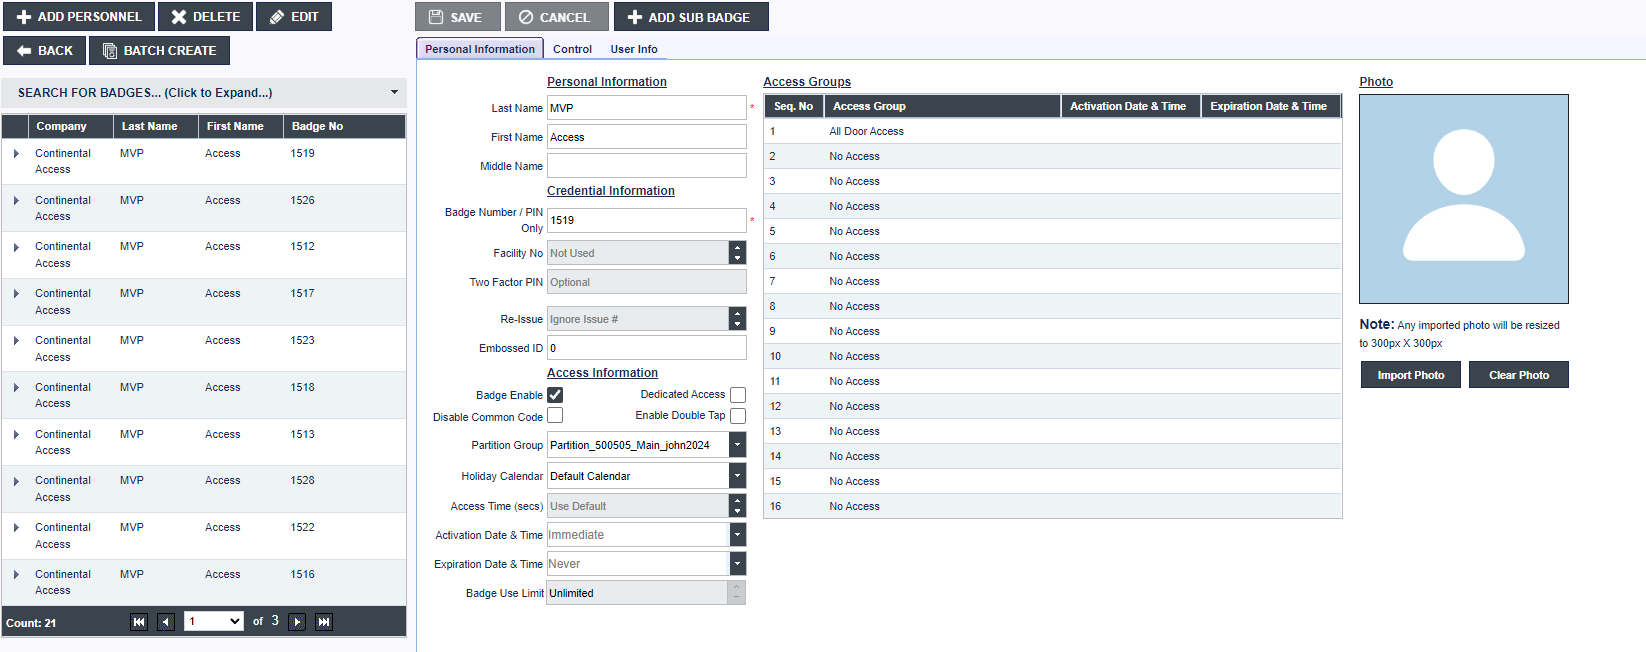
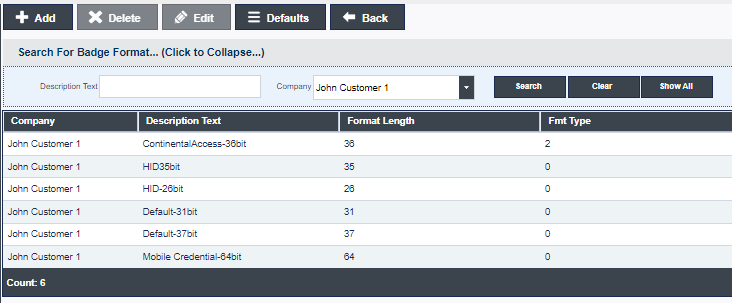
The Personnel screen displays all the enrolled Badges in the MVP Access Cloud and provides the ability to Add badges, Delete badges and Search for a badge.
To open the Personnel screen, click Access > Personnel on the MVP Access main menu.
Click +Add Personnel to create a badge.
Add Personnel (Badge)
Note: Many of the fields in Personnel are optional and set to a preconfigured value. The steps below are the mandatory fields that must be filled in.
Follow the steps below if you wish to ADD a Badge:
Personal Information Tab
By default, many of the Personnel fields are optional and set to a preconfigured value. Below are descriptions of all the Personnel fields.
Company List
Displays the Company/Dealer the Badge is associated with.
Last Name
This field is provided for entering the last name of the badge holder. The field accepts any combination of letters and numbers. A maximum of 25 characters can be entered in this field.
First Name
This field is provided for entering the first name of the badge holder. The field accepts any combination of letters and numbers. A maximum of 25 characters can be entered in this field.
Middle Name
This field is provided for entering the middle name of the badge holder. The field accepts any combination of letters and numbers. A maximum of 25 characters can be entered in this field.
Badge Number/Pin Only
This field is provided for entering the badge number assigned to a particular badge holder or a Pin Number assigned to the user. The Pin number is not the same Pin number entered into the Two Factor Pin box. The Badge Number/Pin Only entry is mandatory for creating a basic working badge. The field accepts numeric values only. Leading zeros if entered, are ignored.
The maximum number of digits that the field accepts depends on the value set for the Max Badge Digits under Badges in the System Settings screen. A maximum of 5, 7, 9, 11, 13, 15, 17 or 19 digits can be set for this control in System Settings. The higher this setting, the more Controller, Lock or Panel memory will be used.
Note: If the Maximum badge length is set to 5, the maximum value you can enter for the Badge Number is 65535
Facility No
If Facility codes are not being used, the default value is Not Used,.
The field accepts numbers from 1 – 10. The default value is "Not Used". The number can be entered by:
You must set this number to the position of the facility code in the Administration>Facility codes screen. See the topic on Facility Codes for more information. When Facility No is set to Not Used or zero in a badge holder record, facility codes are ignored for that badge holder.
Two Factor Pin
Using the Two Factor Pin is Optional. The Two Factor Pin code can be set for 4 or 9 digits in System Settings>Badges. The Two Factor Pin Code is used for dual authentication, a Badge swipe and a pin code entered into a keypad. The Two Factor Pin code cannot be used by itself. The Two Factor Pin code mode is also considered Card & Pin. When the keypad settings are configured to require Card & Pin access at a door, an access card must be presented to a reader and a Pin code must be entered into a keypad before the door will unlock. Two Factor Pin codes can be common/unique for all users. Refer to the Readers topic for information on setting up the keypad modes for Two Factor Pin (Card & Pin).
Very Important: If you choose to use Two Factor Pin, you must change the keypad settings under Readers>Door Control.
Re-Issue
Every badge has an associated Badge Number and a Re-Issue number. The Re-Issue number plays an important role to identify the authorized badge holder in case of badge loss. When a badge is lost, the badge holder will be issued a new badge with the same badge number. But, since the old and new badges now have the same badge number, it becomes necessary that the two badges are differentiated from each other. This is when the Re-Issue number comes into picture. To distinguish between the two badges, the Re-Issue number of the lost badge will be incriminated by 1, and assigned to the new badge.
When reissue numbers are enabled in a badge format (see Badge Formats) for more information), the MVP Access panels will examine the badge and the re-issue numbers to determine if the card holder will be allowed access. The reissue number must match the number in the Re-issue field of the cardholder's Personnel record. If the numbers don't match a Badge Violate Re-Issue error event message is generated and access is denied.
In this way, numerous badges can be issued with the same badge number, but only the most current issue of the badge will gain valid access at any door.
The Re-Issue number can be set by:
Embossed ID
The Embossed ID is Optional. Some brands of access cards (like Weigand swipe) do not have card numbers printed on the cards. Instead, they have a serial number 'embossed' (printed) on the card. The manufacturer includes a document with a cross-reference chart that matches serial numbers to card numbers. That serial number is the only identifier on this type of card. The Embossed ID field is a notation field where the user can use this serial number for reference purposes (in case the card is lost). The Embossed ID field is not actively used by the system, it is for notation only.
Badge Enabled
This control enables or disables a badge. If checked, the badge is enabled. When the badge is enabled, the cardholder's badge record is automatically sent to all Locks and Panels, where the cardholder will be allowed access. When the badge is disabled, the record is automatically removed from every Controller, Lock or Panel, where the cardholder has access. To enable or disable the badge, click on the Enabled Checkbox.
Partition Group
This field is used for selecting a Partition Group for database partitioning. The default selection in this field will be the Partition of the logged in user.
Holiday Calendar
There are a total of five holiday calendars available if configured. By default, only one holiday calendar is configured. It is the default holiday calendar.
Access Time
Access Time is the number of seconds that a door is held unlocked (that is, open state) after a successful badge read. The Access Time control in the Personnel record can be set to 'override' door open times for certain users, without affecting the door open times for the general population. Door open times are set in the Readers screen, on the Options tab. Access Time values set in a badge holder's record preempt settings in the Readers screen, for every door that the Badge Holder has access to.
The Access Time can be set by:
Activation Date Time
The default setting for Activation Date Time is Immediate. Activation date time is a means of automatically enabling a badge based on date and time. When a badge record is created with Activation date set to some date and time in the future, the system will automatically enable the badge on the indicated date.
Once enabled, the system will automatically download the badge record to every panel that has doors, that the cardholder is allowed access. Activation happens at the time configured in the Activation Time Date field.
The Activation Date can be set in the following two ways:
1) Typing a date and time of choice in the Activation Date Time field. The date entered must be in MM/DD/YYYY or MM/DD/YY date format.
2) By using the calendar to choose a desired date. Click on the Activation Date Time field, a calendar window of the current month and year will be opened, with the current date in highlight.
Note: Single left/right arrows seen at the top of the screen can be used to scroll backward/forward through the dates/months of a year, for desired date selection.
Expiration Date Time
The default setting for Expiration Date Time is Never. Expiration date and time is a means of automatically disabling a badge based on the date and time specified. Disabled badges are not deleted from the database; they are 'deactivated' and can be reactivated at any time later.
Note: The date entry must be in MM/DD/YYYY or MM/DD/YY date format.
Once a badge record has been deactivated, the system will automatically remove that badge record from every Controller, Lock or Panel where it is stored. Deactivation happens at the time configured in the Expiration Date field.
The Expiration Date can be set by typing a date of choice in the Expiration Date field. The date entered must be in MM/DD/YYYY or MM/DD/YY date format.
By using the calendar to choose a desired date. This can be done by following the steps below:
Note: Single left/right arrows at the top of the screen can be used to scroll backward/forward through the dates/months of a year, to select a desired date.
Note: When a badge is disabled by means of an Expiration Date and Time, the system will remove the check mark from Enabled Checkbox, in the concerned Personnel record.
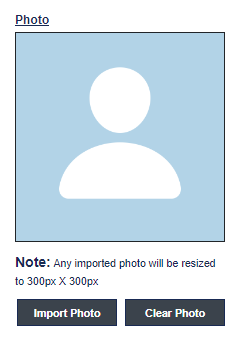
Photo
The Photo provides the ability to assign a photo to a badge.
To assign a photo to the badge, click Import Photo and navigate to the Photo and select it.
To Clear the assigned Photo, click Clear Photo.
Control Tab
The Control Tab contains Category's that are used for Threat Levels or Category Counters. If Threat Levels are being used, each Badgeholder can be assigned one or more Categories.
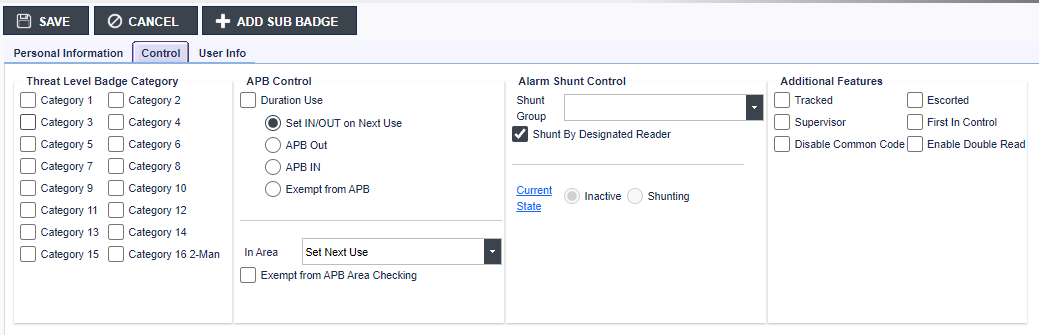
Tracked
The tracked function is usually used to track a badge holder's movements throughout a building. When the Tracked Checkbox is enabled (checked) for a particular badge record, a different priority level is assigned to the badge.
Priority levels for badge card reads are set in the Readers screen (for more information, refer to the Readers section). In the Priorities screen, observe that the default priority for a Tracked Badge is higher than the default priority for a valid badge. This means that, even though a Tracked badge read is a 'valid' badge read, it will be treated differently.
There are two specific differences in the handling of a tracked badge versus a standard valid badge. They are:
Escorted
When Escorted box is checked for a badge, two badge reads are required at the reader for the Escorted cardholder to gain access. The second badge read must be from a non-Escorted type card. However, an Escorted card will require a second badge read only at those readers that are set up as Escort readers (for more information on setting up an Escort reader, refer to the Readers section). At a non-escort reader, a badge set to Escorted is treated in the same way as any other non-Escorted badge. To enable escorted, click the Escorted Checkbox.
Supervisor
The 'Supervisor' Checkbox is selected when the personnel badge if flagged as a Supervisor. The selection does not provide any additional permissions to the badge.
FIrst In Control
The First In Control is selected, when the personnel badge is used for a First-In Control for Free Access or First-In Card Access Feature.
First-In Controlling Free Access
This feature controls a reader’s free access activation. When presented during the Free Access Time Schedule the lock then go into Free Access. It requires a designated badge to be presented to a APB Entry to Area reader to start free access. The free access schedule configured for this reader must be active for this function to occur. Once a designated badge activates free access, there are only two ways to terminate free access. To deactivate free access, the free access schedule must end, or the operator must manually deactivate it from the main menu. The presentation of the designated badge WILL NOT deactivate free access.
First-In Controlling Card Access to a reader
This feature controls Card Access at a reader. This feature requires two readers, one APB Entry to Area reader and one APB Exit from Area reader. It requires a designated badge to be presented to a First-In APB Entry reader to enable the reader (turn on the reader). Prior to this, the First-In APB Entry reader is disabled (reader is off). After the First-In APB Entry reader is enabled by the designated badge, it will remain enabled until the designated badge exits the APB Exit from Area reader. Once this occurs, the First-In APB Entry to Area reader will be disabled again, until another designated badge is presented to it.
Disable Common Code
When the reader is configured for "Keypad Enabled" and the common code option is checked off for "User Badge Number / Pin Only" mode, by Default, any entering badge number will grant access to the door, if the badge has permission. By checking "Disable Common Code" in personnel screen for a badge, that badge will not get access if badge number is entered to that particular door.
Enable Double Read
From the reader screen, under the General Tab, if "Double Read Holds Door Unlocked" is enabled, any badge that has "Enable Double Read," will be able to Double Read the Reader to set the door to unlock hold.
With this new feature, no one will be able to set the door to unlock hold, even if they already have access to that door, except for the badge(s) that have “Enable Double Read," selected.
Note: The Reader must be set to "Double Read Holds Door Unlocked" to use this feature.
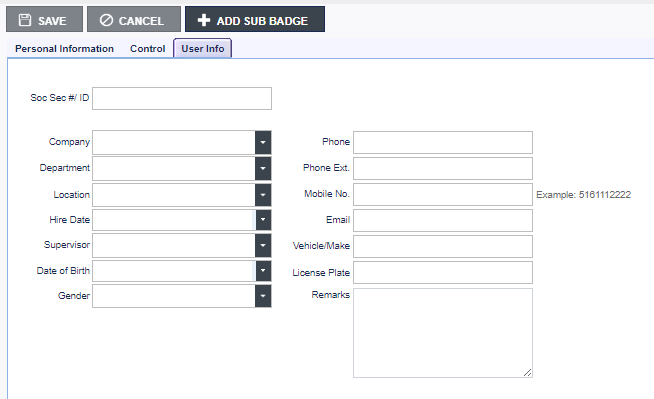
User Info Tab
The User Info Tab contains all User Information fields. All User Information fields are optional.
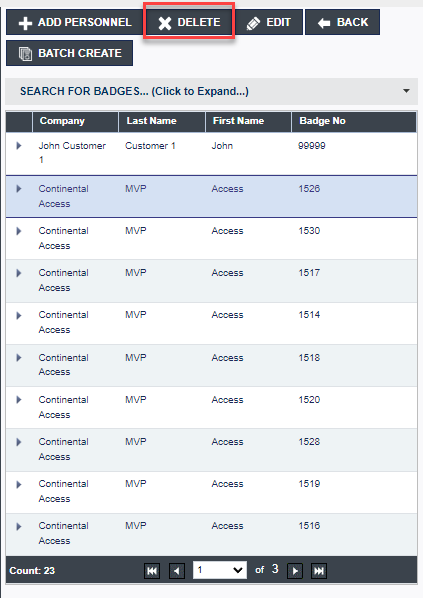
Delete Badge
To Delete a Badge, select the Badge in the Badge list and click Delete.
Edit Badge
To Edit a Badge, select a Badge in the Badge list and click Edit. Make all the necessary changes and click Save when you are done.
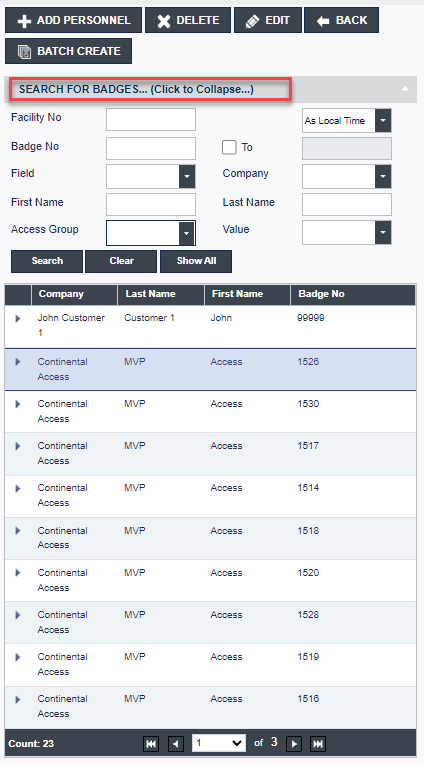
Search for a Badge
To Search for a Badge, Press the "Click to Expand" and then enter one for the available fields on the Search screen and click Search.
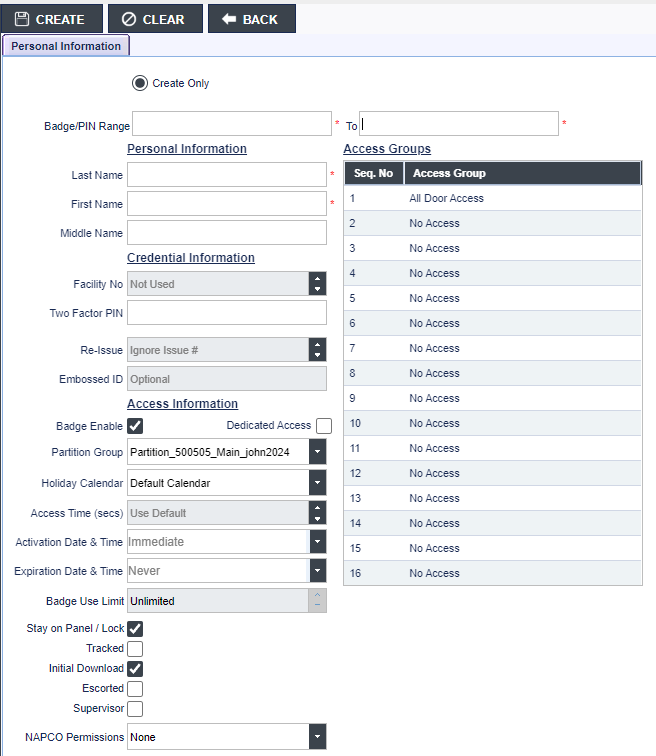
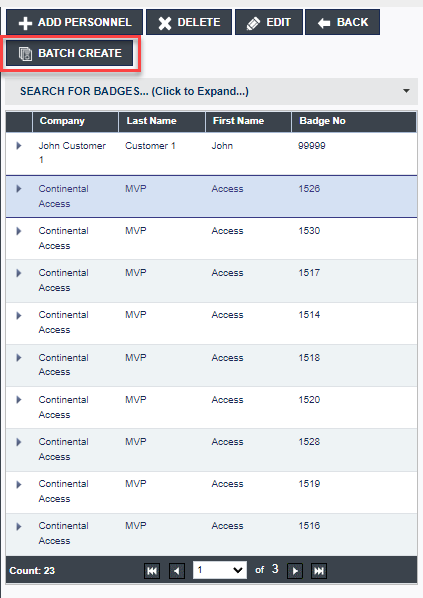
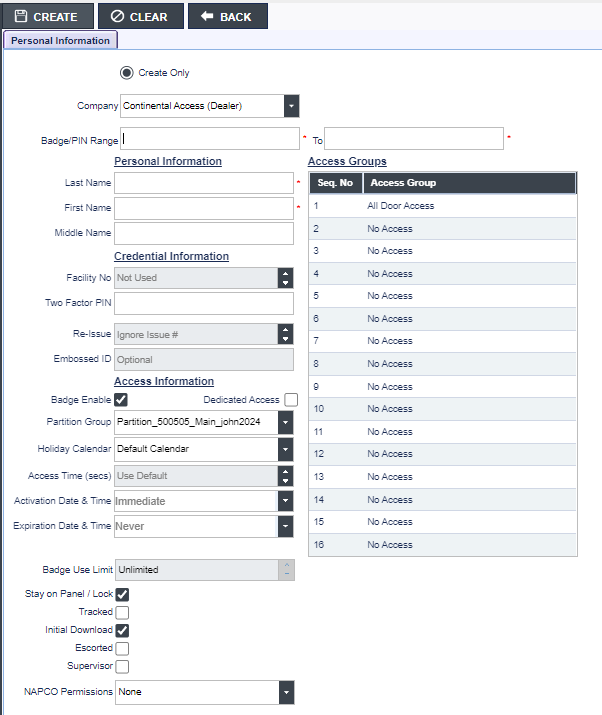
Batch Create
The Batch Create function provides the ability to batch load up to 100 badges with consecutive badge numbers. Click BATCH CREATE.
Upon clicking BATCH CREATE, the badge batch create form will display.
Follow the steps below if you wish to batch in up to 100 badges.
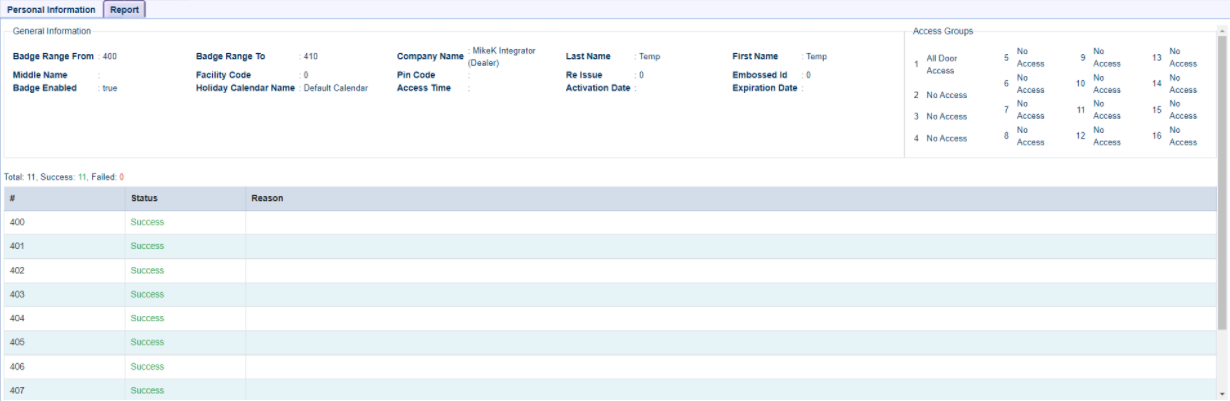
Upon performing a Batch Creation of badges, a report will display, only if there are errors while batching in the badges.
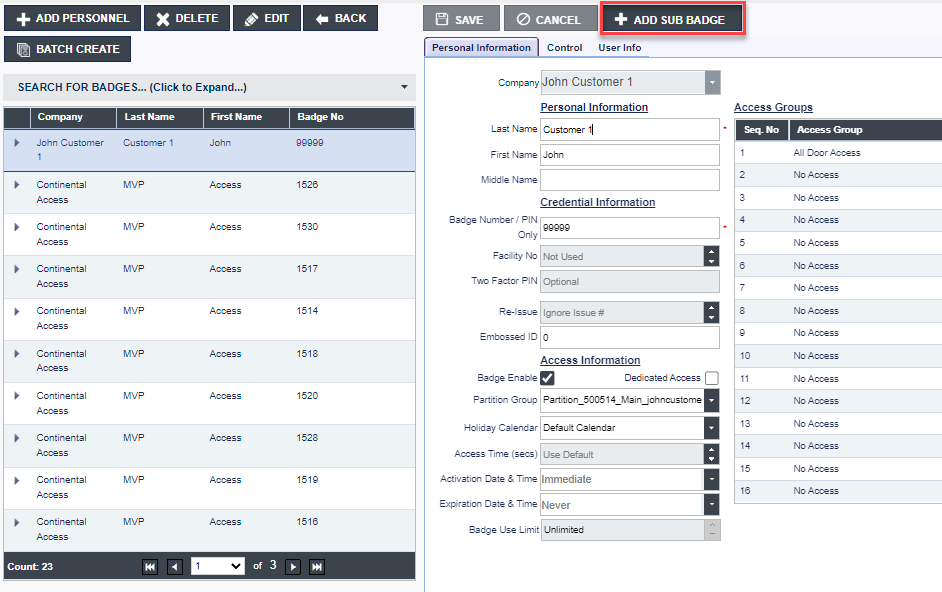
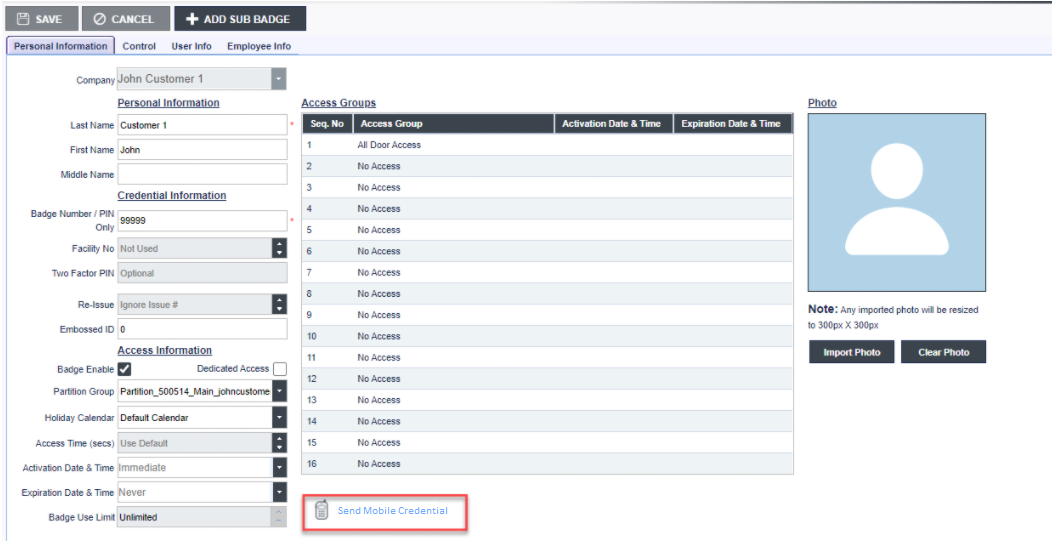
Add Sub Badge
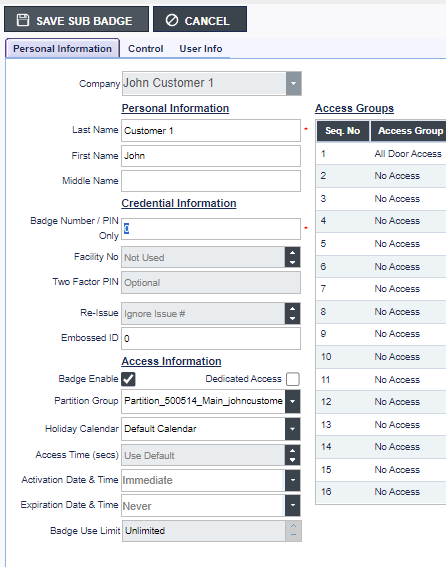
The MVP Access software supports multiple credentials for one Person. Click Add Sub Badge to add a second credential to a Person.
Upon adding a second credential to a person, click Save Sub badge.
MVP Access provides the ability to issue Bluetooth Mobile Credentials.
Issuing Bluetooth Mobile Credentials
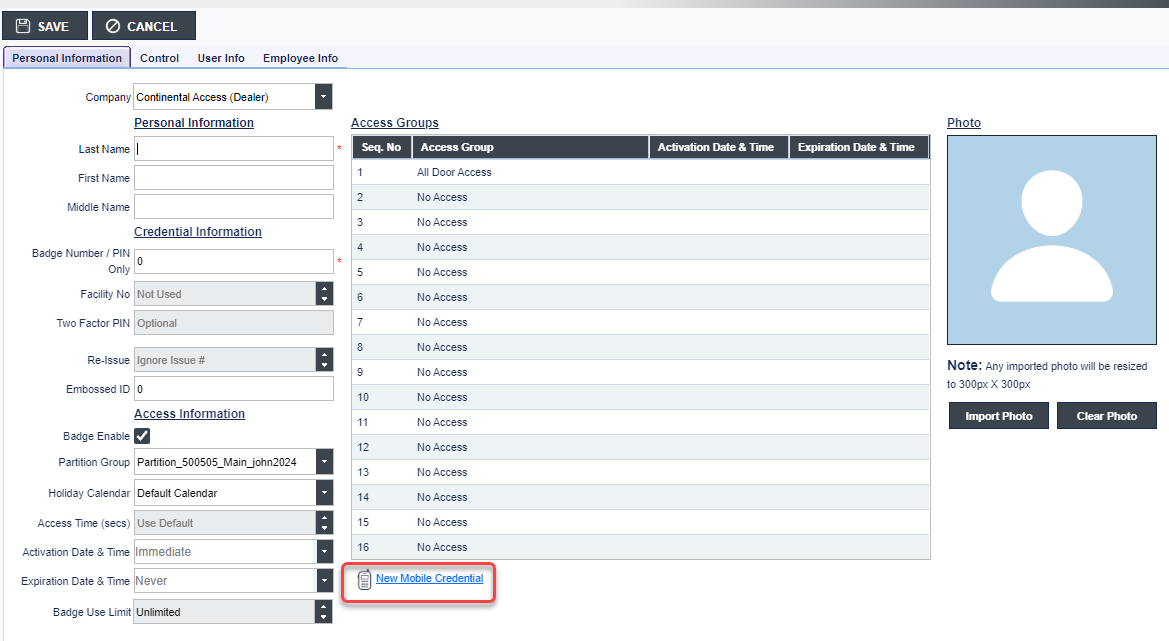
Follow the steps below if you wish to ADD a Mobile Credential:
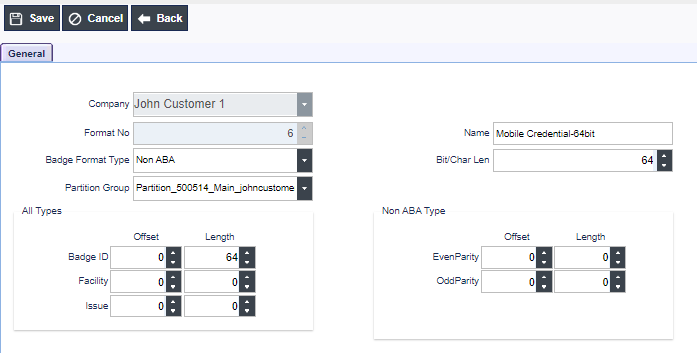
Go to Access > Personnel and Select Add Personnel.
Note: Upon adding the Mobile Credential badge format into the Administration>Badge Formats screen, the New Mobile Credential icon will display.


MVP Access provides the ability to issue NFC Credentials. NFC (Near Field Communication) credentials for access control are digital identifiers stored on devices like smartphones or cards, enabling secure entry by wirelessly communicating with an access control system over short distances. Both the smartphone and the reader must have NFC technology built in to function properly.
Configuring NFC Credentials
Follow the steps below if you wish to ADD a NFC Credential: