
Important: Before proceeding, please confirm that the doors have been activated on Napco's Remote Service Platform. For activation assistance, contact your MVP Access dealer directly.
All Trilogy Networx Locks and Net Panels require a gateway, either the MVP-IM3-80211 or MVP-IM3-POE, both of which are cloud ready out-of-the-box. Additionally, Alarm Lock GEN3 Gateways can be upgraded to support MVP. For steps on how to convert an Alarm Lock Gen 3 Gateway using uniVerse Finder Utility Software for use with MVP Access Click Here.
Click to see a list of supported Wireless Locks/Net Panel: Supported Wireless Locks/Netpanel
🎞️ Watch Adding Gateways, Expanders and Wireless Locks to MVP Access video tutorial here!
I. Adding a Wireless Gateway (Com Port) for use with Trilogy Networx™ Wireless Locks / Netpanel
Note: To add a Trilogy Networx™ wireless lock or Net Panel to MVP Access, you'll first need to add an Alarm Lock Wireless Gateway to the Com Port section in MVP Access. Please confirm that the Wireless Gateway is one of our Supported Gateways. Please refer to Wireless Hardware Placement Tips (Gateway and Expanders) for best practices when installing a Wireless Gateway or Expander.
1. Connect the Wireless Gateway to the customers network using an ethernet cable and power up the gateway. Please wait at least 2 minutes while your device acquires a DHCP IP Address.
2. Go to Configuration > Com Ports and then press Add
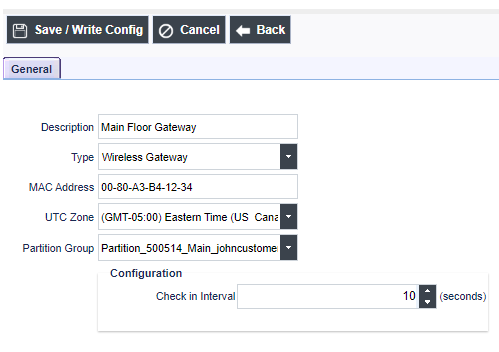
3. Enter a Description for your Gateway
4. Select Type Wireless Gateway
5. Enter the Networx Gateway MAC Address
6. Select UTC Time Zone and Select Partition Group (Main is Default). Then press Save . (Leave configuration at default interval)
7. Press Save/Write
II. How to Add a Lock / Net Panel
Important: Gateway must be added into the Com Port screen first, prior to adding a Lock / Net Panel. Please refer to initial Step I. Its recommended to have your locks installed at its final location before proceeding.
..::All locks and NetPanels must be defaulted prior to discovery::..
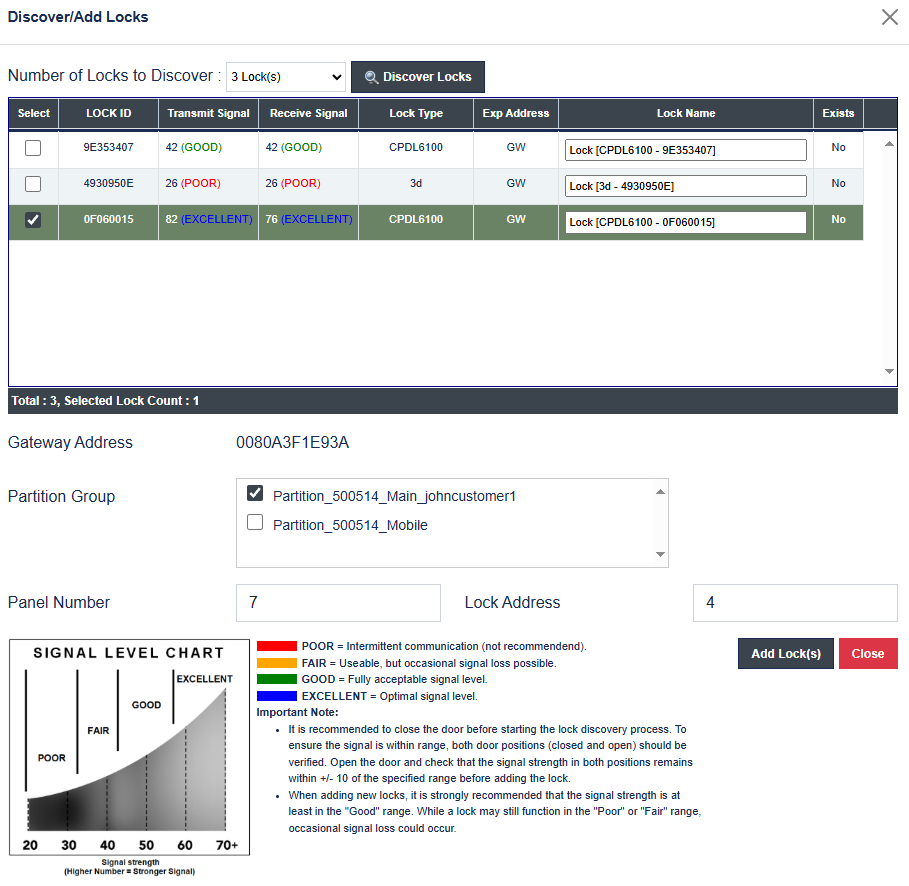
1. Go to Configuration > Wireless Configuration and under Locks click on the Discover Locks. Select the Number of Locks to Discover (the default is 1 lock) and then click on the Discover Locks button
Important:
For the best results, aim for a signal strength in the Excellent or Good range (Fully Acceptable Range). Signal strength between 32 and 42 is considered Fair, while values above 42 are considered Good. If necessary, relocating the gateway or adding optional AL-IME2 expanders may help improve signal strength. See Wireless Hardware Placement Tips (Gateway and Expanders)
2. Once the locks / Networx Panel are discovered, choose your device by LOCK ID. Each lock and net panel will come with a Yellow LOCK ID card displaying the Serial LOCK ID. By default, all locks
are assigned to the main partition. Select the lock serial number you want to add and click on Add Lock (s).
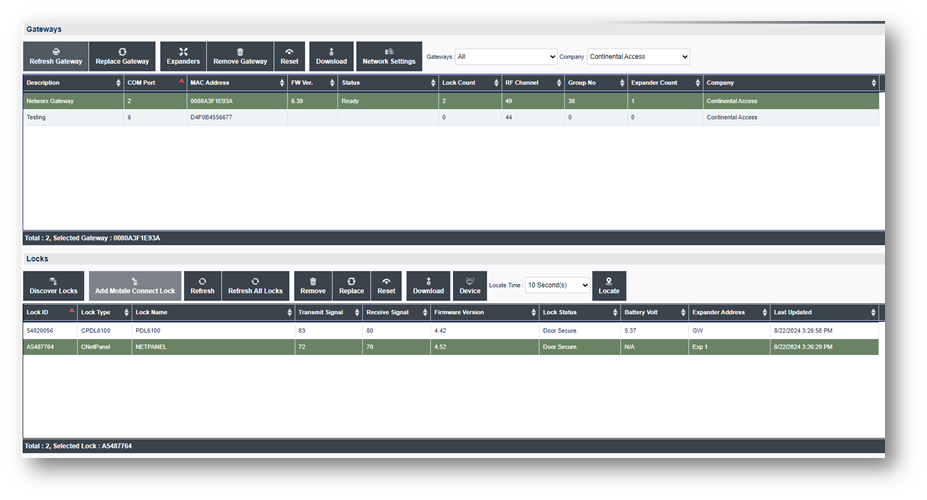
3. After the lock is successfully added, close the confirmation box and “Add Lock (s)” dialog box.
NOTE: The configured lock will be displayed on the lower grid of the window under “Locks.”
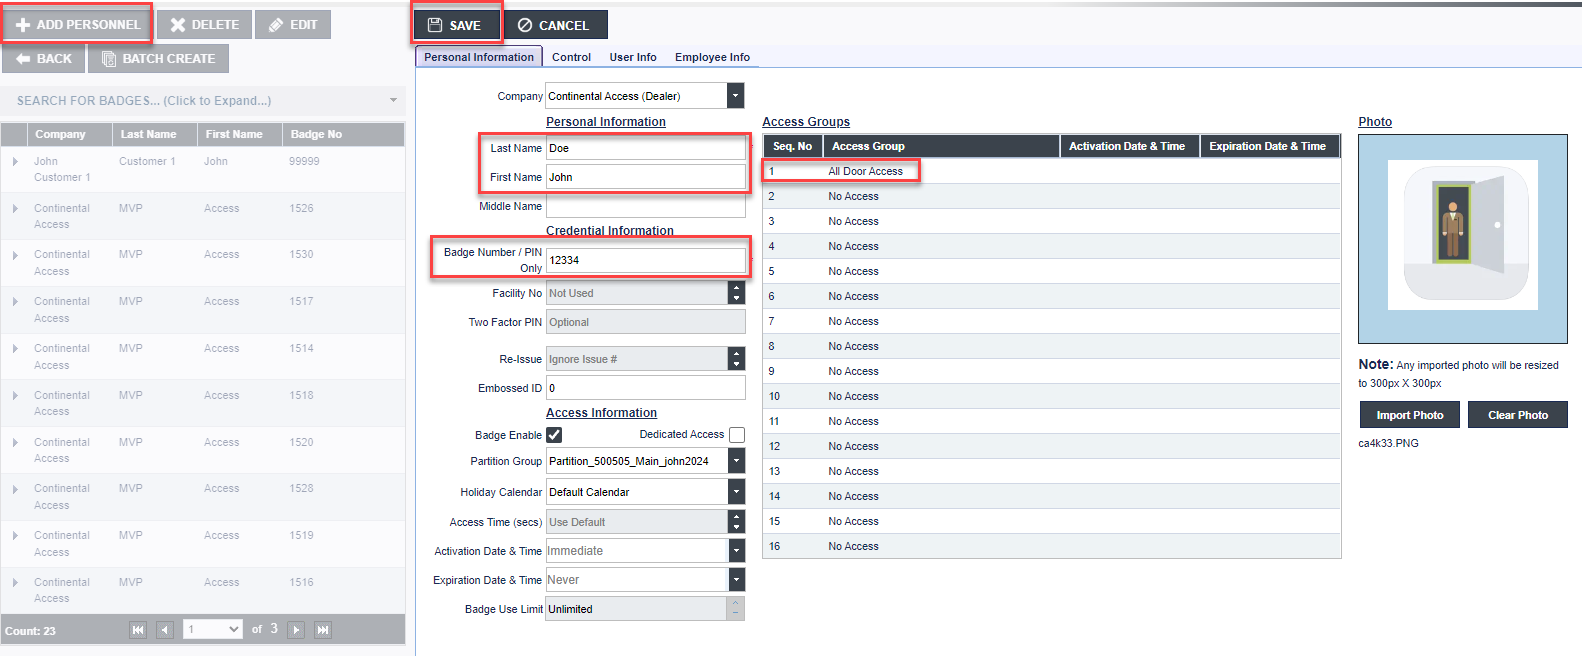
4. You are now ready to add a Badge and test. Go to Access > Personnel and Click + Add Personnel.
NOTE: By default, newly added locks or Net Panels will automatically be assigned to the default access group “All Door Access.”
5. Enter the values below into the required fields. Then Press Save.
a. Last Name: <Person’s Last Name>
b. First Name: <Person’s First Name>
c. Badge Number / PIN Only: <Enter a Badge Number>
d. Access Groups: <Select Access Group from available list. by default, "All Door Access" is selected >
For more details on adding Personnel please see Personnel